Club Stuff
14-3-2013
TWENTY FIVE Years of Bucket Racing
1988 to 2013
Bucket Racing Association of NSW celebrate 25 years of Bucket Racing.


Safety Wiring Mods
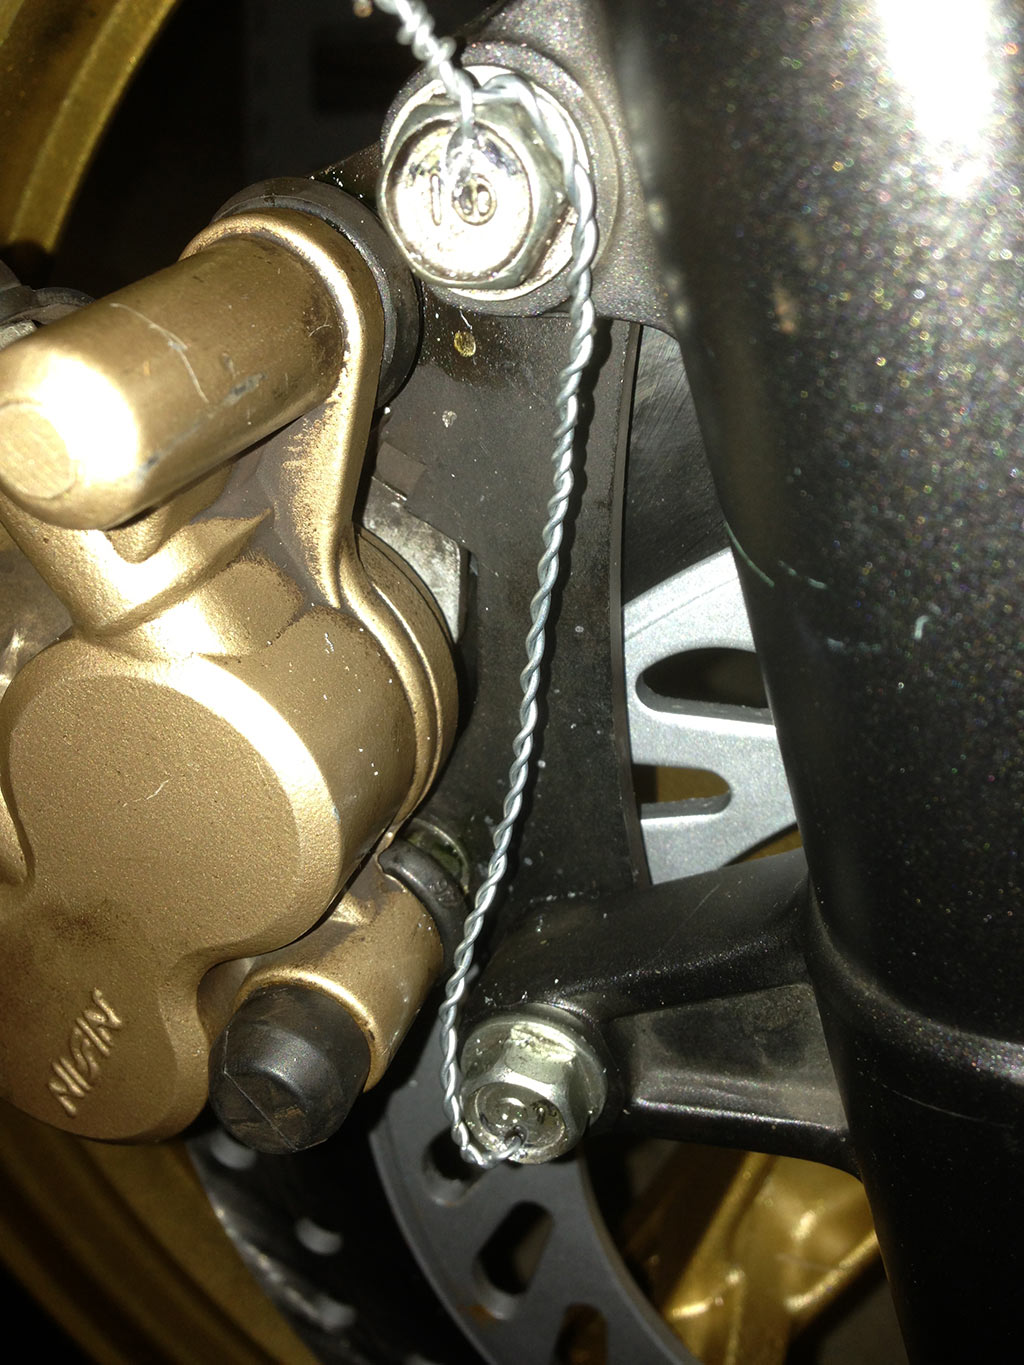
Front
Brake Nuts Safety Wired as per Rules.
Rearsets
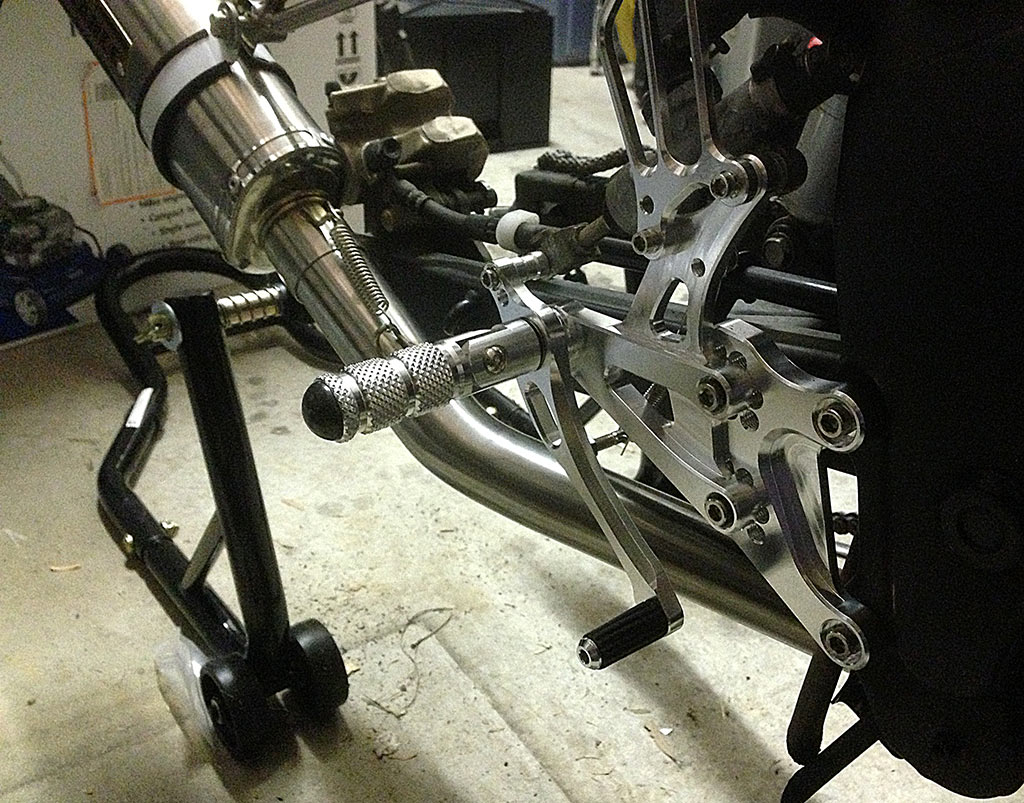
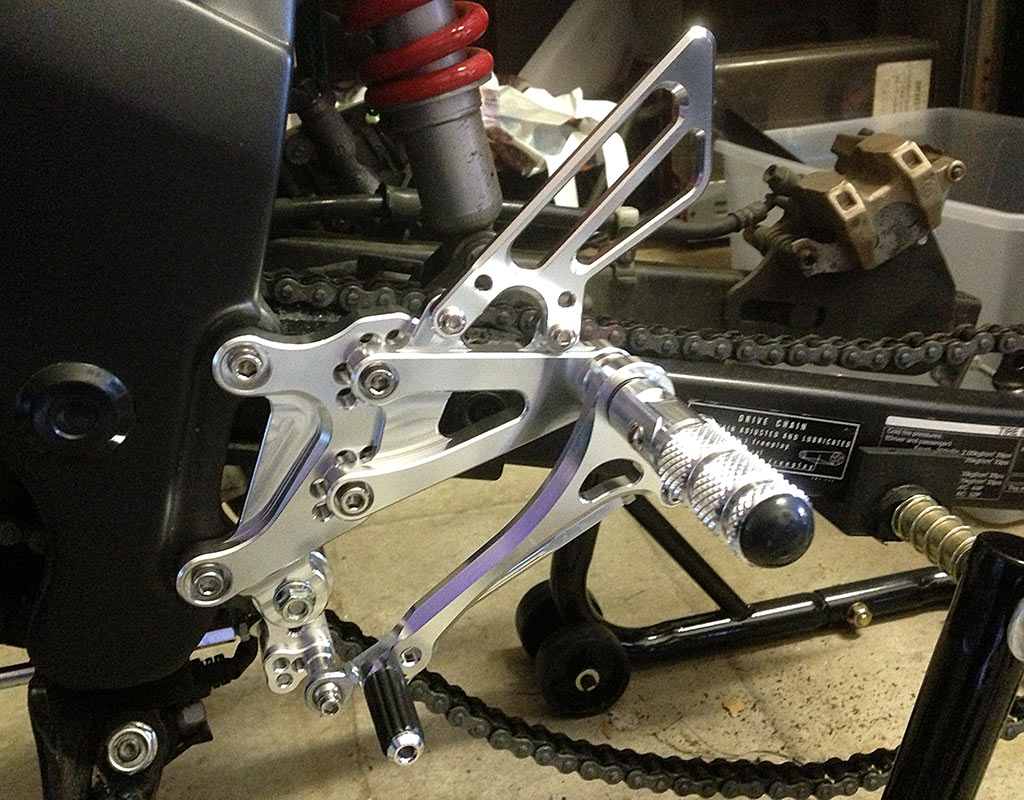
Rear Sets LHS.
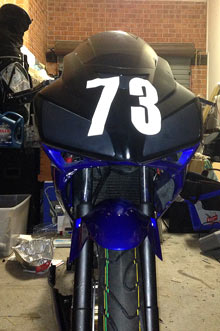 Finished nose fairing with numbers and light inserts fitted.
Number Plates
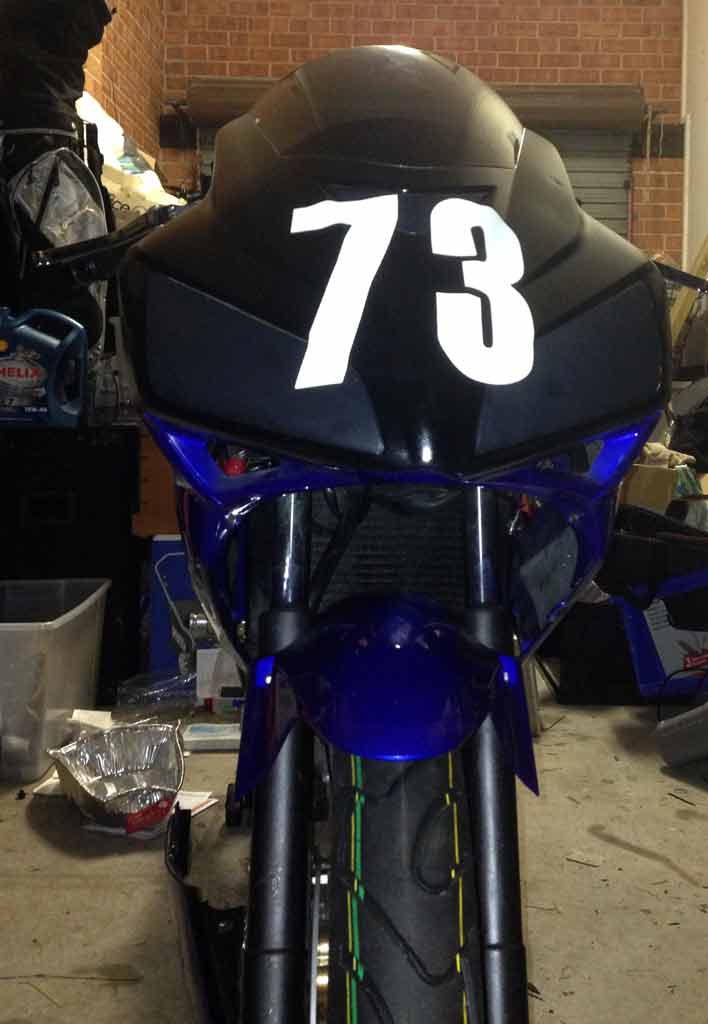 Finished nose fairing with numbers and light inserts fitted.
Finished Rear number Plate on Commuterlite.
 Left
Side Crash-bar bent into shape before final
trimming.
Left
Side Crash-bar bent into shape before final
trimming.
Engine Crash Bars

 Left
Side Crash-bar bent into shape before final
trimming.
Left
Side Crash-bar bent into shape before final
trimming.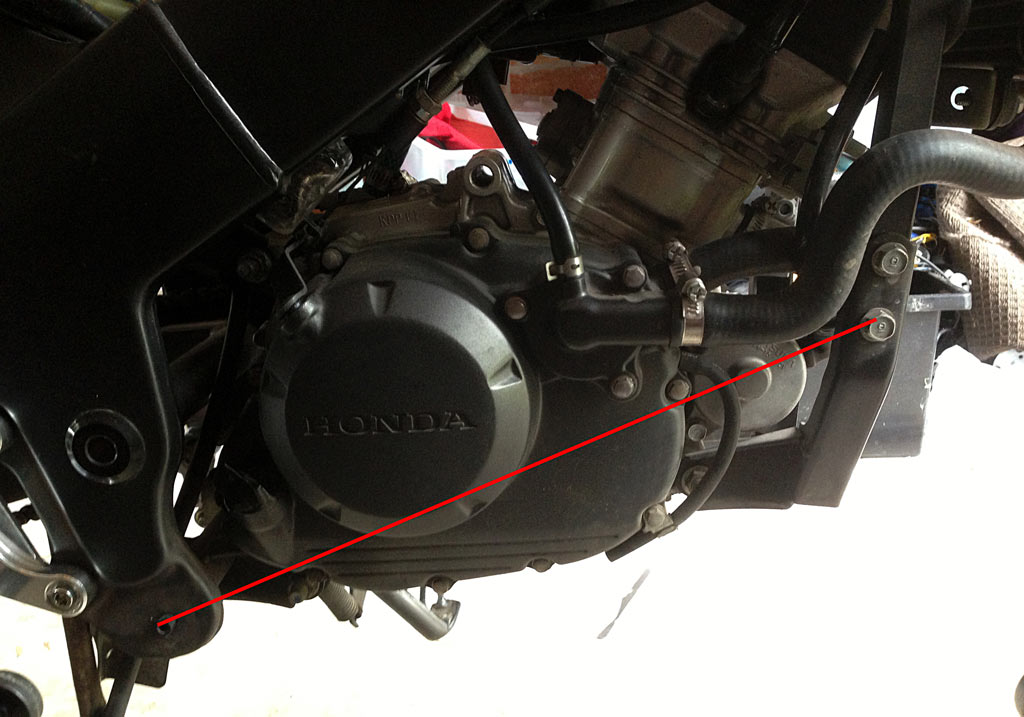
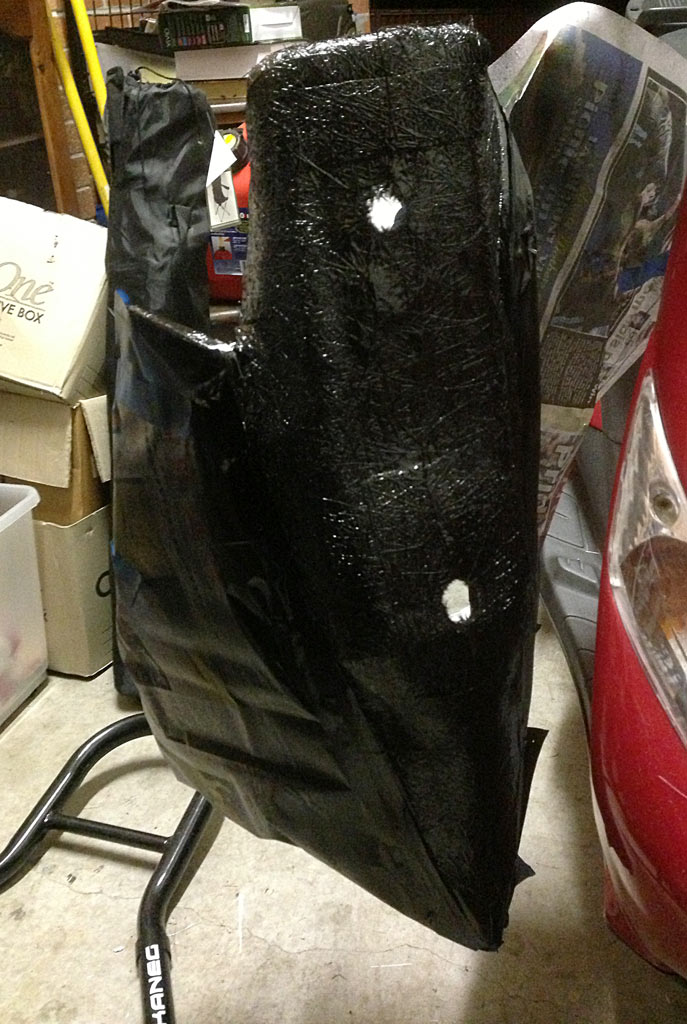
Belly Pan Mods.

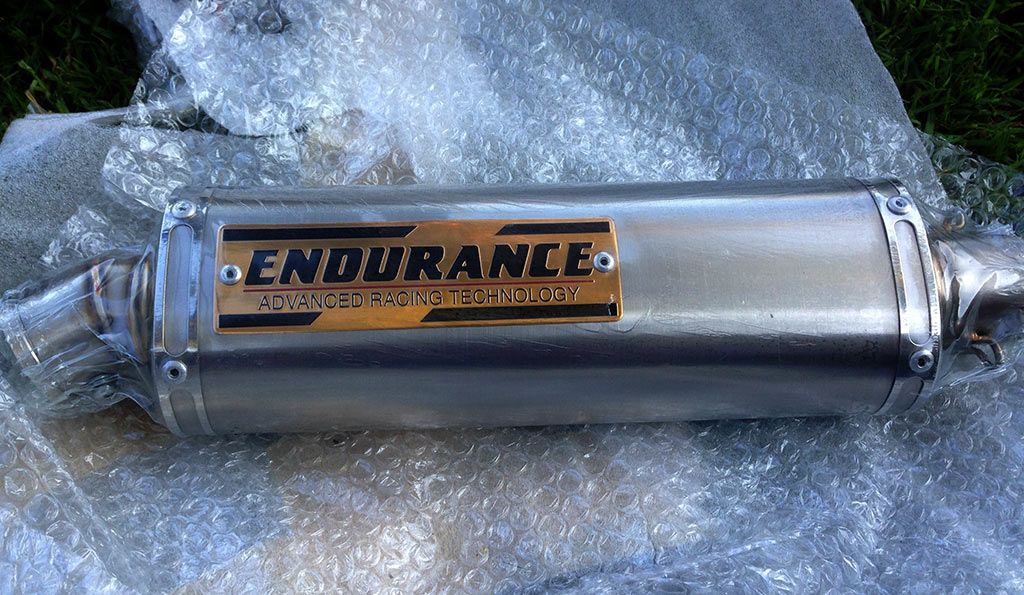
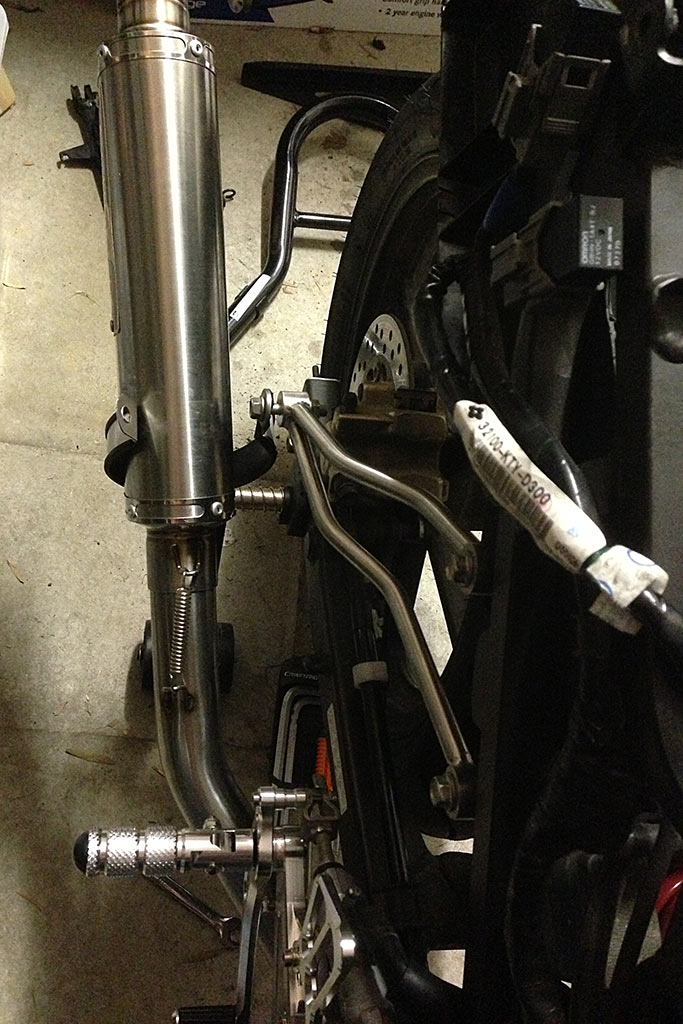
Exhaust
This Could be You!
Get yourself a
Honda CBR 125
or similar and Race in the Commuterlite Class.
Be like 2011 Champion Ron Carrick and race in the cheapest, fastest growing class in Motorcycle Racing.
Commuterlites
One Mans experience of going Bucket Racing.
The purpose of this article is to write up the progress - journey of building a Honda CBR125 Commuterlite racer. It takes a bike (damaged) from acquisition to race ready and what the experience was about.
By Oliver Higgins and Jye Lawrence
Background
Here’s a bit of a background about me (Oliver) and how I came to be building a Commuterlite.
For some time I have been a road rider. Riding large capacity bikes with no skill whatsoever on roads, going nowhere near the limits of the bike. I had an off a couple of years ago. Nothing major was hurt other then a foot-peg, some scratches and my pride. It could of have been much worse and I was thankful that it was not. Even though I continued to ride I did not enjoy it, my son had just been born and I just did not see the point anymore. I ended up selling both my 900 & 600 after a time and was just left with a 100cc scooter that I inherited for a job I did.
I have ridden some new machines such as the ZX10R on a track since but have no real desire to return to road riding… At least not in the sense that I had been.
Through work I met Jye Lawrence (Jye’s father has been racing with the BRA since the 90’s and Jye has been administering a motorcycle racing forum for a while) and since the beginning we have discussed bikes. He has been at me to come and at least have a look, if not find a bucket for some time. I constantly dismissed his suggestion due to family, work and what not. Until one day I finally listened to him when he was talking about Commuterlites. He directed me to the "building a Commuterlite" page on www.ozbucketracing.com
Competing in motorsport is something that I had always aspired to do yet the lack of funds seemed to hinder any progress that I may have dreamed of. It suddenly dawned on me that I could build a race bike and be some what competitive for less the price of what it was costing me to keep my bike on the road (rego, insurance, fuel costs, track days, coffee) and be in a safe environment that encouraged racecraft.
This was my light bulb moment.
Going forward I saw 2 major issues that may hold me back. My skill to actually build the machine in the first place and second my ability to actually race the bike when it came to race day.
Let me also point out that my background is in Health & Technology. I also operate as a part time photographer and whilst I have done some work on cars, I have not done anything other than an oil change or a chain clean and lube on a bike. The very idea was extremely foreign to me. If I can do this project, anyone can.
For the sake of this argument I read the commuterlite rules as if it can be unbolted and does not present a safety issue it can come off. If it is welded, it stays.
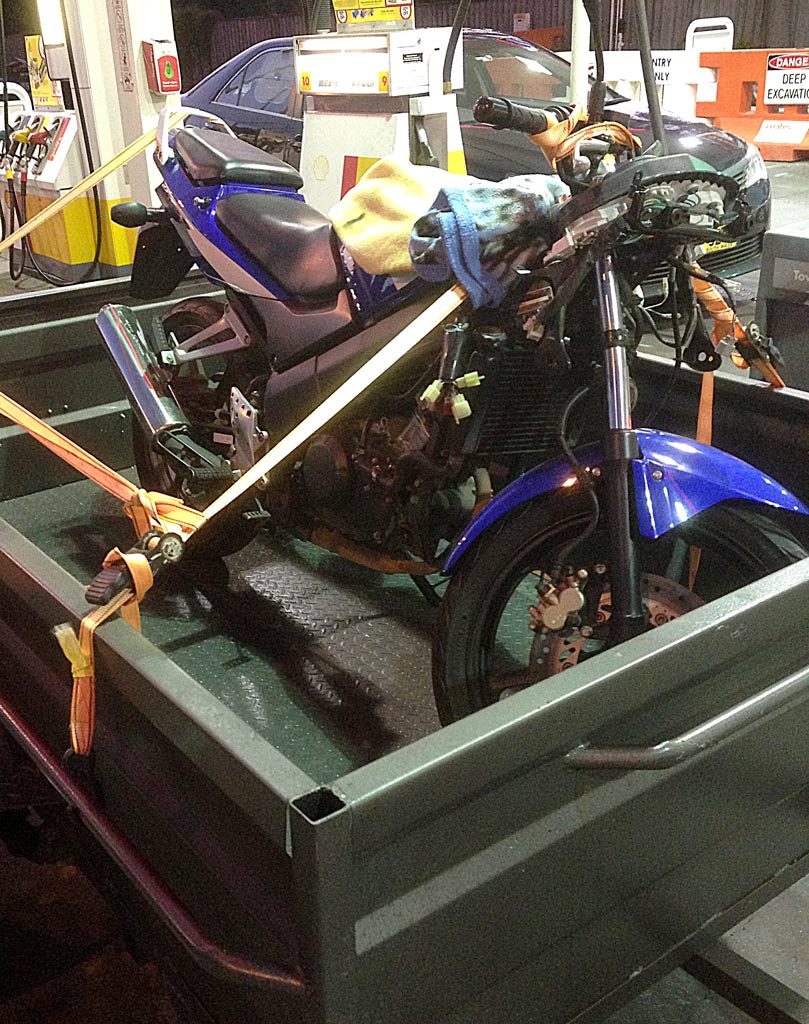
Finding a donor Honda CBR125 bike
My original plan was to look out for something over the next few months. I chose to check eBay, Pickles auctions and Gumtree when I could. Both eBay and Pickles offer a notification service to email you when items come up matching your search.
You have 2 options when looking, a working and roadworthy one or a damaged or written off one. The bike I was able to get was a 2007 Honda CBR125 that I found on gumtree. It had been in a front end and left side accident. On inspection it appeared that it was mostly fine.
The following ended up being damaged and needing replacing:
- Forks, not just the inners were bent but the bottom was cracked
- Front wheel turned out to be buckled, as did the front disc and axle.
- The lower triple clamp also needed replacing.
- Left bar end was damaged
- Some small fairing scrapes and cracks
- Bent clutch lever
- Bent left foot peg and gear lever
I Digress
Before you go any further, work out when you want to
go racing... Set a goal. Go and sort out your PCRA
membership, then your MA license then your race
entry when it becomes available (And BRA membership
of course). The reason for this is they all take a
bit of time each but have to be done and should not
be left to the last minute, you need two months to
process all of these.
Finally it might sound
silly, but be organized and have fun. The build
process takes some time but I found it quite
therapeutic. You will be pulling a lot of parts out
and bolts etc. Have a good clean organised work
area; keep like area bits together and put bolts
back into their threads/bolts where possible.
Finally read this article in its entirety before you
start. I have done my best to keep it in some order
but things do pop up.
The Stripdown
- Remove the rear passenger grab rail & luggage points.
- Remove the rear seats and fairings.
- Remove the left passenger foot peg.
- Remove all the lights.
- Remove the battery and set aside. (mine turned out to be dead)
Looking from the
back you will see the starter relay and some
fuses on the left hand side of the mudguard.
These slide out but may take a little muscle due
to them being on a rubber block.
The rear
mudguard has 2 screws in the back, which you
remove, and then it unclips from the front.
- Remove the exhaust pipe, 2 bolts on the header and 1 on the muffler.
- Remove the right hand passenger foot bracket/exhaust hanger.
- Remove the right foot peg.
- Remove rear wheel
- Remove the airbox and breather hose
- Remove the side stand,
remove side stand switch
The Front End
I had some
front end damage; I started by removing the
front guard to find the lower part of the
front shock damaged.
Before removing the
front, check the rotation of the disc and
rim. Mine turned out to be bent and had to
be replaced. Doing now will save some time
sourcing it later. The disc's for these are
relative inexpensive compared to larger
capacity bikes. (I think it was around the
$100 mark from Honda) remember you can only
change some things to aftermarket so at this
point you must have an OEM disc.
- Remove the front brake caliper.
- Remove the front wheel, Be mindful of the sides the spacer and the speedo drive are on.
- Put wheel aside.
- Undo the handle bars and remove the tiny clip ring keeping them on.
- Remove both of them.
- Loosen the top cap nut of each fork leg BEFORE you pull them out.
- Undo the top and bottom triple clamp
- Slide (or be persuasive with a mallet) the legs out.
- If straight put aside, if not put
somewhere else for the time being
Your Honda CBR125 should now look something like this.
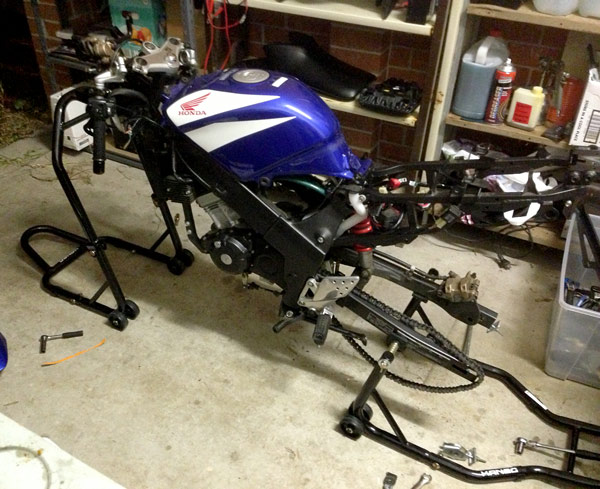
The
CBR125 ready for reassembly. All damaged bits are removed.
Sourcing spares and other items for your Honda CBR125.
My local Honda dealerships were great and the rest were sourced through findapart.com.au or eBay. CBR125R's are a popular bike in Thailand. There are a few sites around with some Googling and eBay has quite a bit too. Make sure you have a bracket for your exhaust as not all of them come with them. Here in Australia Kaneg stock the Paddock stands and head-lift stands. They also have rear sets. (I'm not affiliated with Kaneg at all, I just got some of my stuff from them and they are local to me.) Jaycar have the resistors for the fuel mod. I also got some parts from Faddybike online.
Repairs
Whilst the front forks were bent beyond
repair they would have been pulled apart
anyway. The lower triple clamps turned out
also to be bent. Lucky for me when I
purchased the replacement front forks they
came with the lower triple. Now to remove
this you will need a second person. I'm not
going to go through changing the headstock
over as it somewhat time consuming, but be
mindful of the bearings.
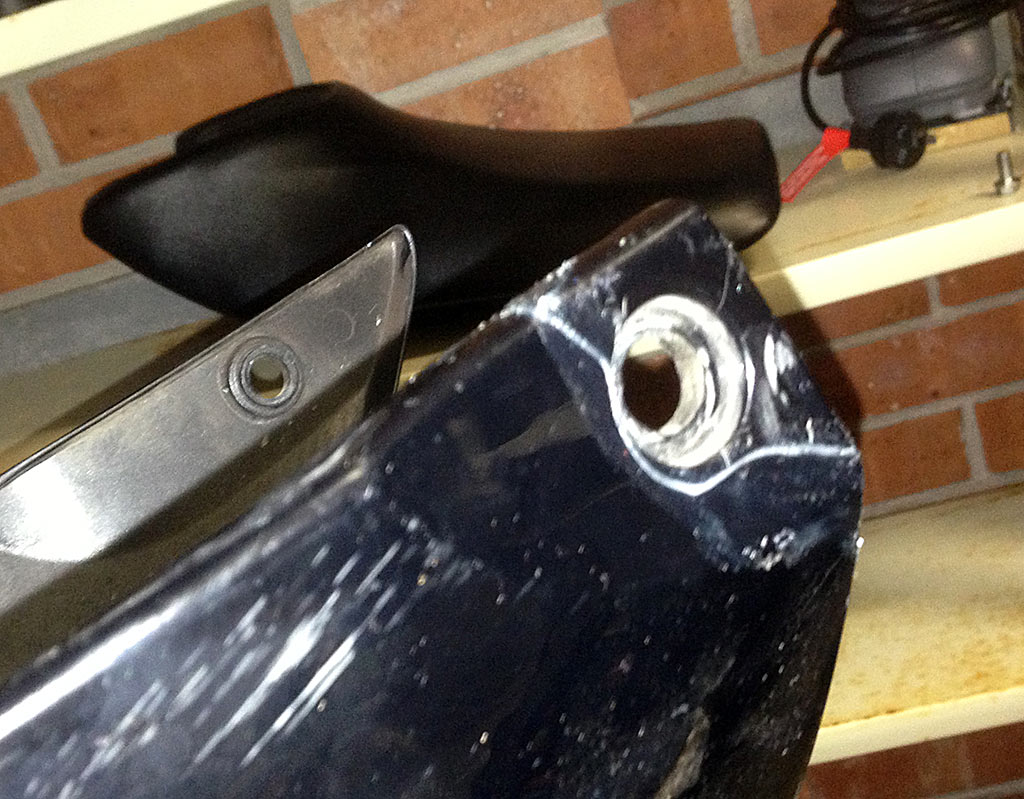
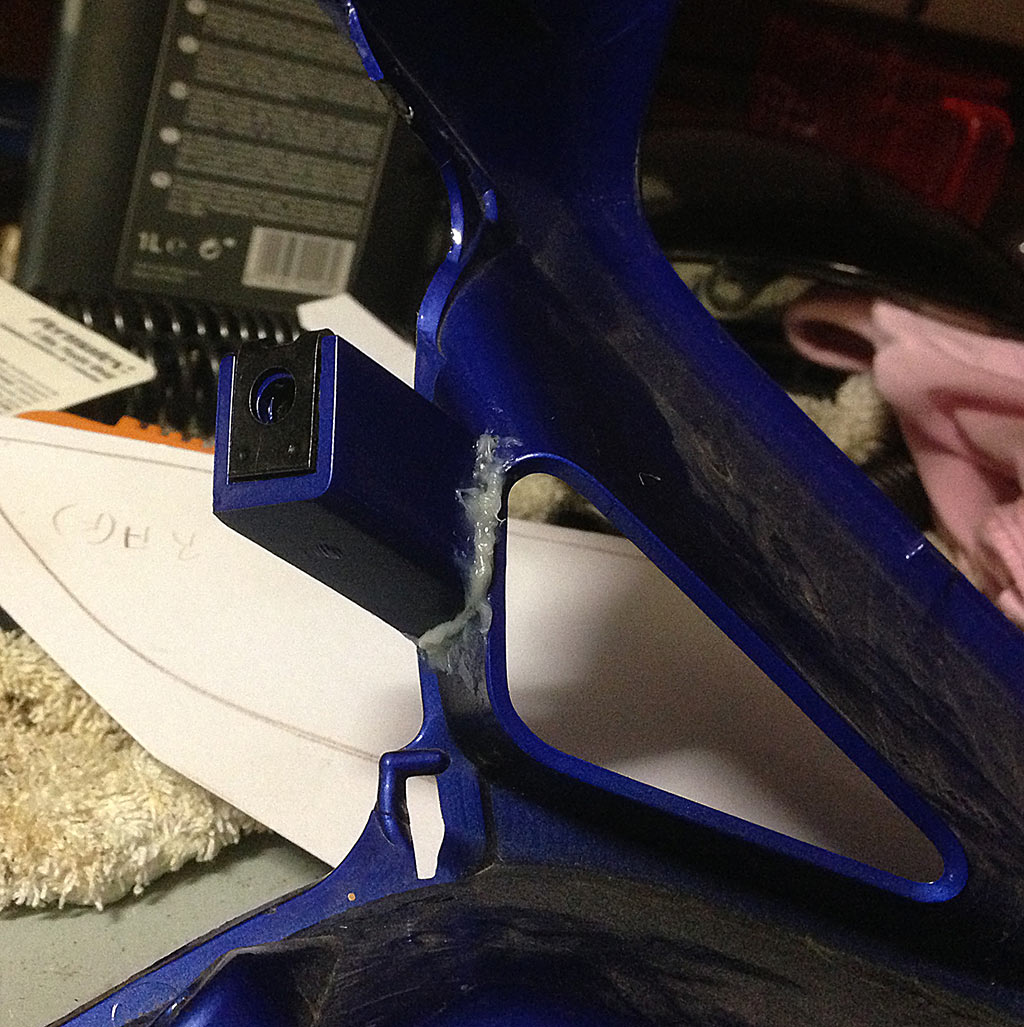
Fairing
There were a
couple of small cracks on the fairings. I
used PermaPoxy 5min plastic weld from
supercheap. About $12.00 I think.
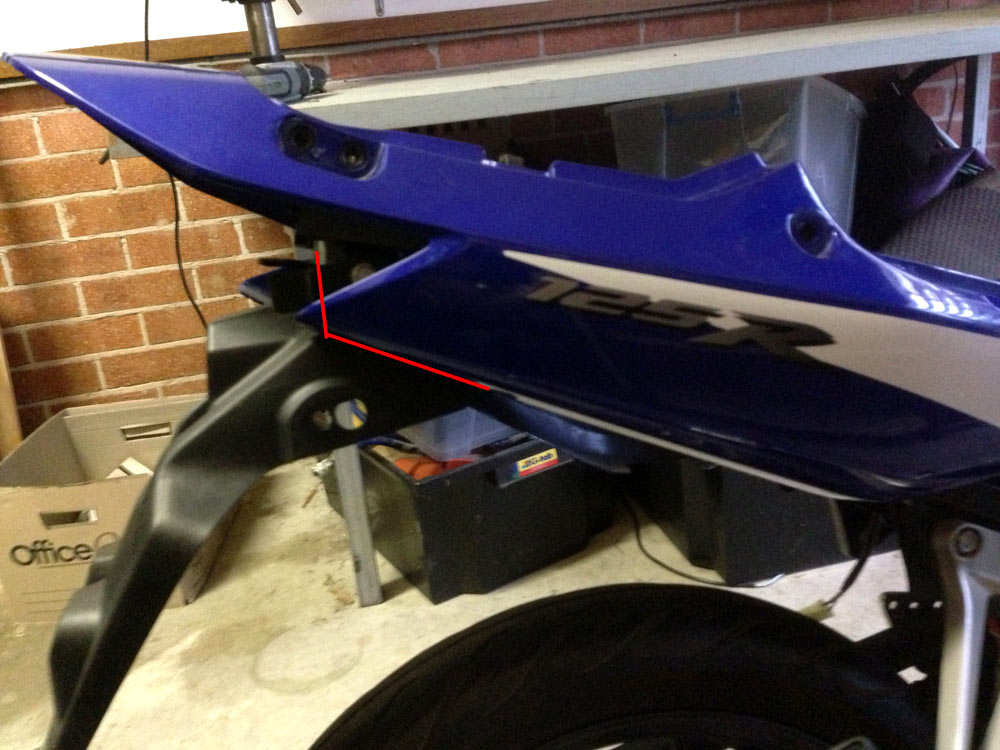
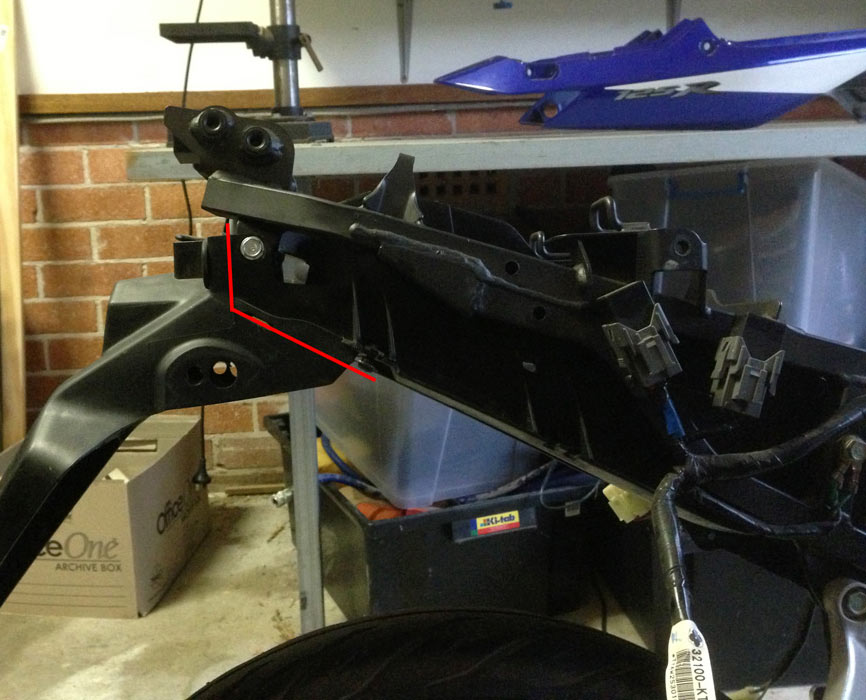
The Build
Cutting the tail and number plate holder off I chose to cut across the line to retain the bolt holes making it easier to put back together.
Cutting the front springs.
This was done by placing the springs in a vice and measuring 100mm from the tightly wound end. A packer was put in to replace this length.
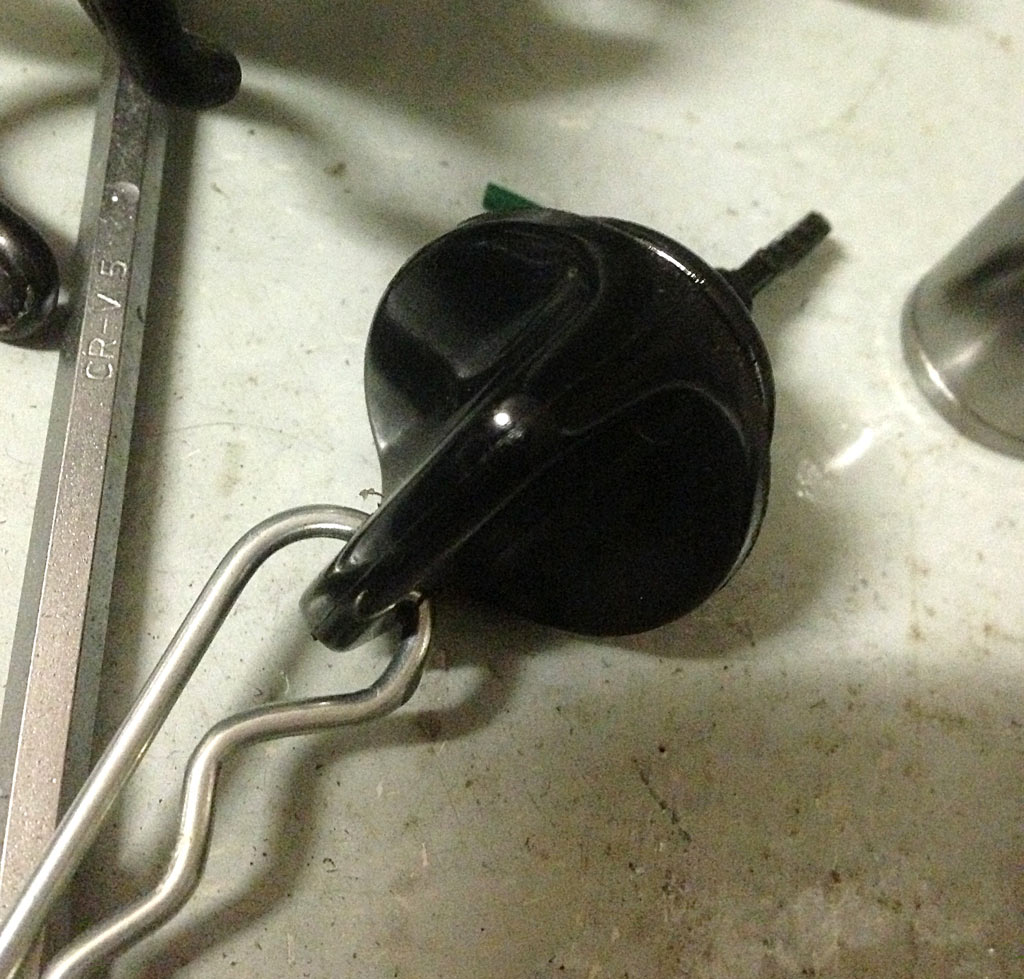
Fuel Modifications
To do this correctly you should have the bike put on a dyno and tested. Follow the guide on "building a commuterlite".
Tyres
I used
Sava tyres. I understand there are different
options available. My local dealer got them in
as a special order for me and had them fitted
and balanced.
Exhaust
An Aftermarket exhaust is allowed. Fitting the exhaust is straightforward; it should bolt straight on but watch your flange thickness where it joins the manifold.
Breather hose
If you decide to remove the airbox you will need to have the engine breather hose to go into a catch bottle of 300ml or greater.
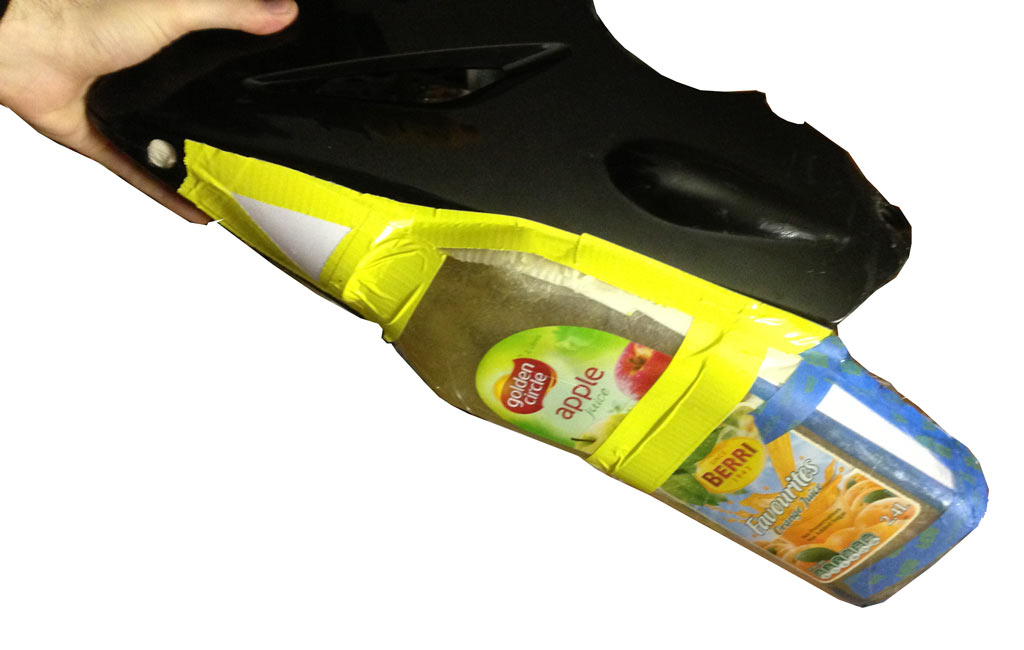
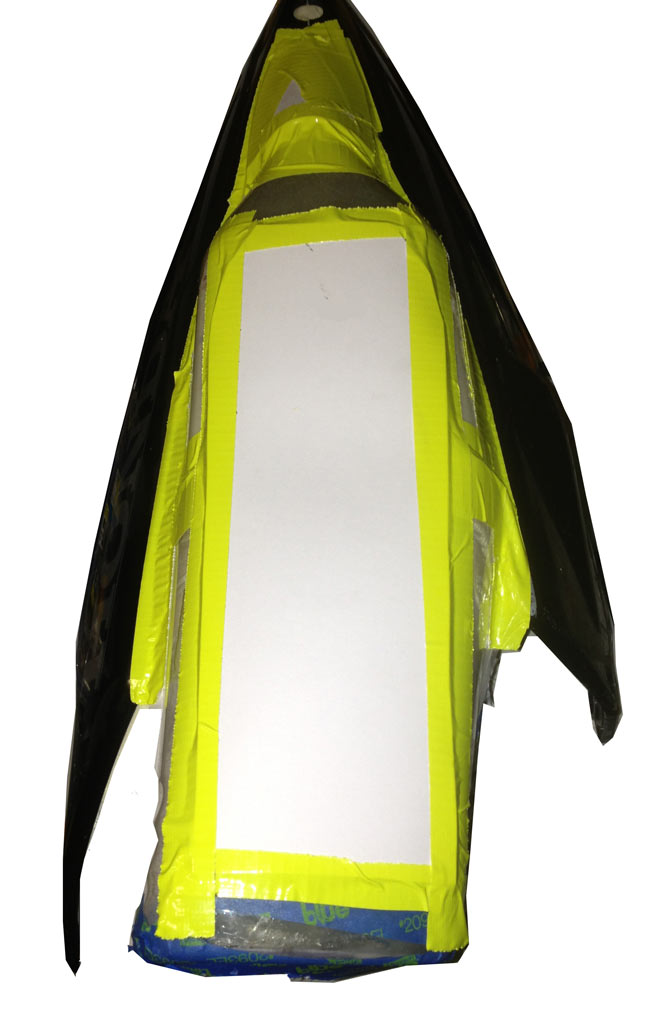
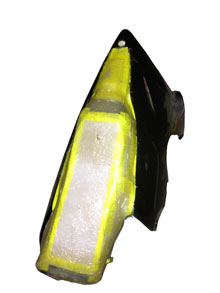
Catch pan
You must have a catch pan in that will hold 3L with 2x 25mm holes. I made mine from fibreglass and dremelled out the holes. Its not to difficult a job, just messy and time consuming. I then finished it in black paint.
Headlight covers.
I used the stock fairing and I ended up making some inserts which I was not happy with. Therefore I trimmed the old headlights back and covered them. Now if you take note of nothing else take note of this. On the back of the headlights is a little black box with a socket in it. This is you bank angle sensor. You need this. You need this to be in the exact same orientation as it is now, along the centreline of the bike. It is not uncommon for people to forget to keep these. The bike will stop if it falls over, so if you don't line it up or put it back right it may cut out on you when you lean the bike.
Race Prep for Commuterlite Honda
CBR125.
Lock wire:
This is pretty straight
forward, follow the directions on the "How
to build a commuterlite" page.
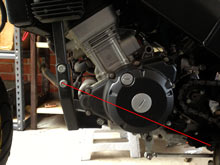
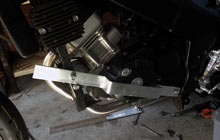
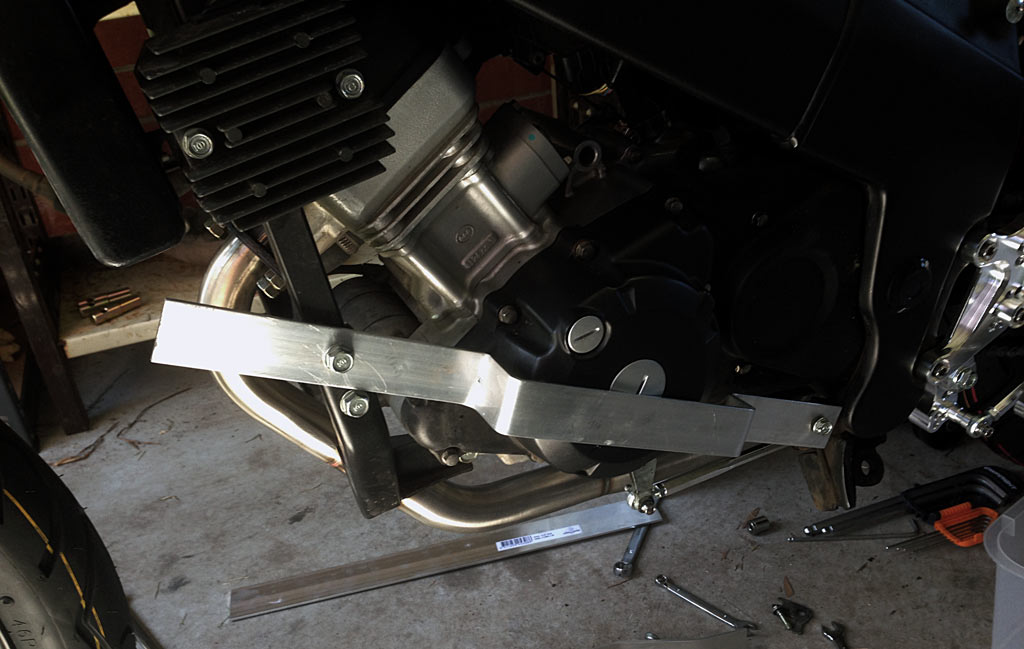
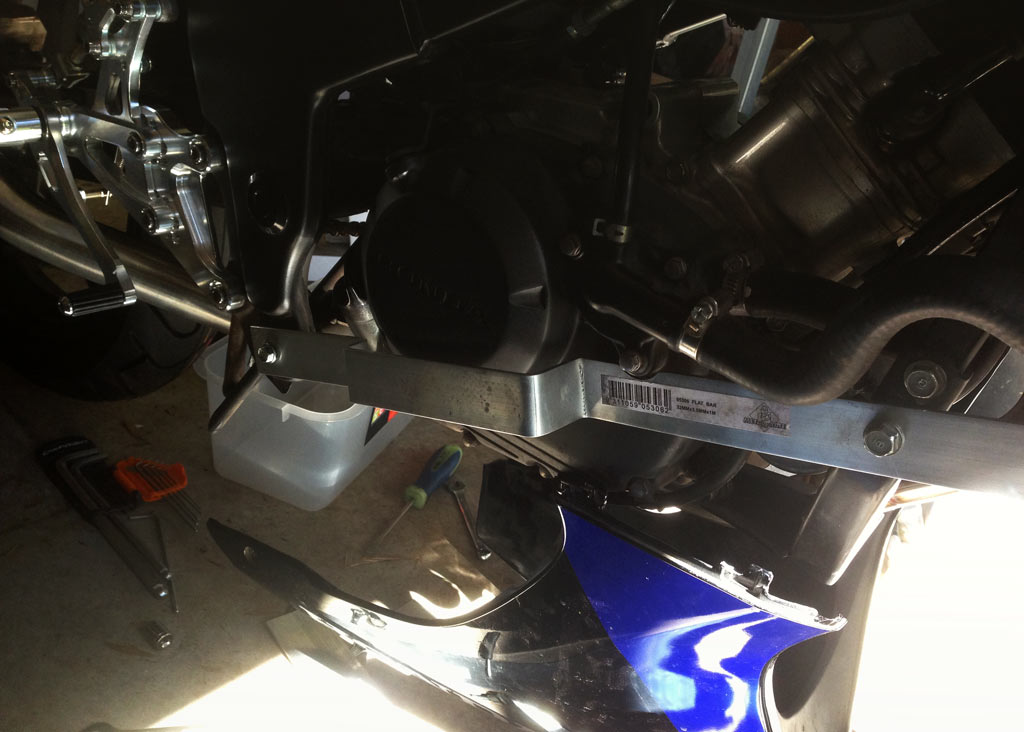
Engine guards:
I used some 36mm x 3mm Aluminium from Bunning’s and bent them using
the mallet and the vice. I used the 2 points
pictured but I saw a lot of different ideas
on race day.
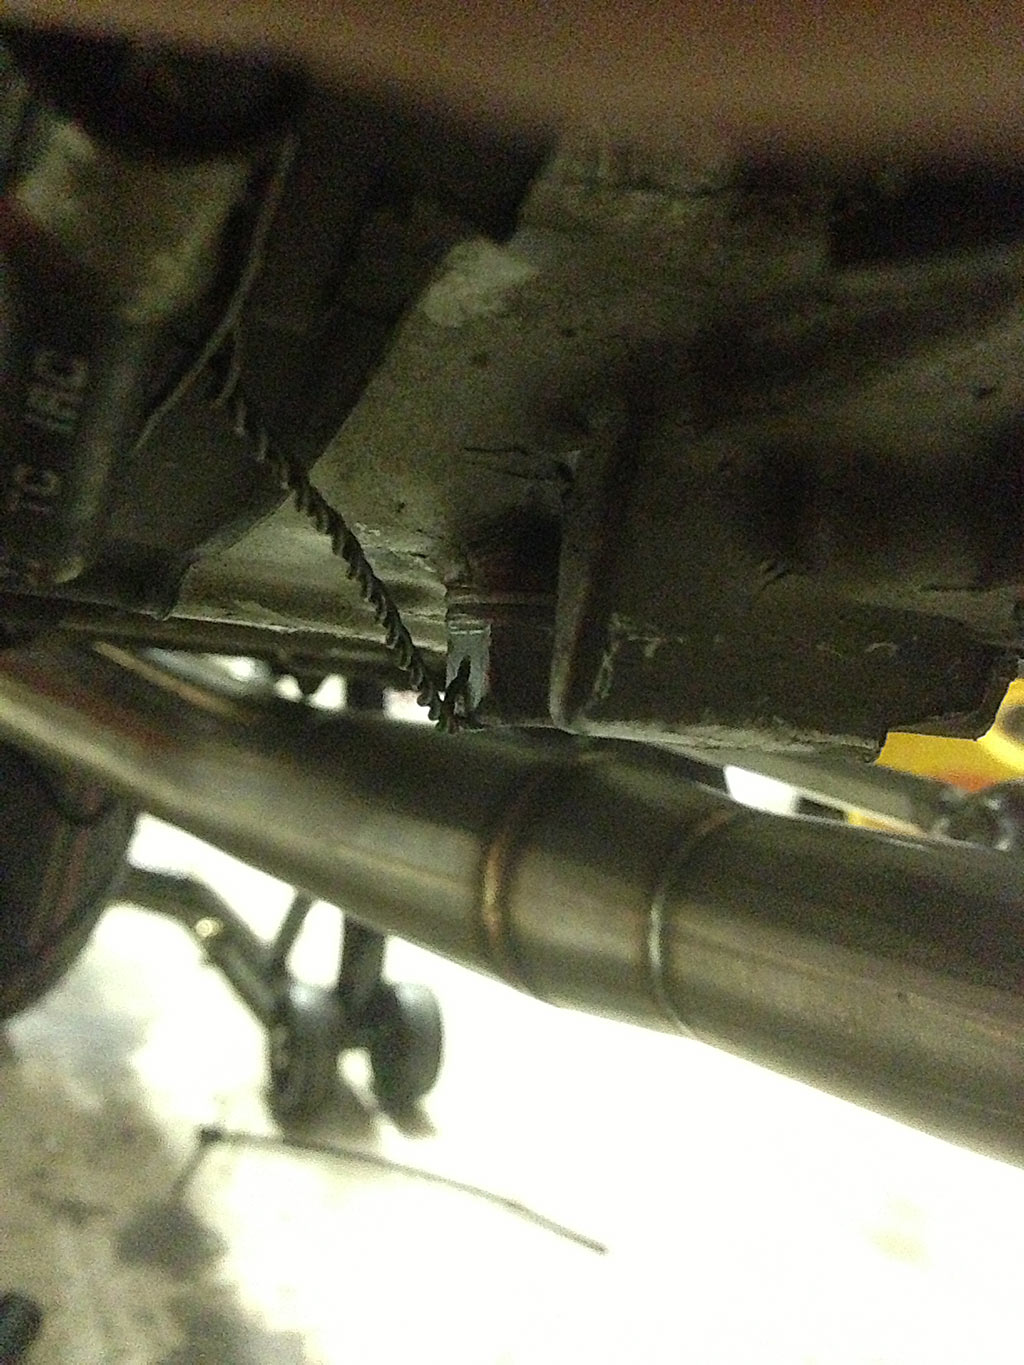
Shark fin" chain guard:
You can buy these for $40-50, but you will still need to screw, tap and mount them. I found a small piece of "U" channel in the gate and fencing section at Bunning’s. Cost was about $3. Cut off one side of the u and then cut a slight angle along the longer piece. Trim the top to fit the width of the swing arm. Once done, I cut a small slit in the top along the bend 2x10mm or so long. This is where the cable ties go to hold it in place. Then file or grind smooth all the edges and paint as this was gal and I did not want the open parts to rust.
Painting
I had some damage to the top fairing so I just gave it a rough sand and painted it black. 2 coats of primer, 3-4 coats of black. It made it easier to put the numbers on later. Save yourself the pain and make sure you buy some good quality masking tape.
Coolant/Fluid’s
You must replace all the coolant in the system with water. This is a pain of a job to do. I waited till the end and whilst the radiator is easy to flush the reservoir bottle is not. Pull it out a bit and get somebody to help you tip it over if need be. For your oil get a 10w-40 Fully Synthetic oil. I have heard some reports of the 0w and 5w oils not working well in these machines.
Number Plates
I got a plastic storage box from Bunning’s for $14 and cut the sides out with my dremel. Used some basic metal scaffolding, about $1.90 each and attached it to the back seat. Whilst I would have liked to have a nicer looking rear cowl it worked. Remember it is white number on a black background and there are regulations about the size and shape of the numbers. (See MOM’s)

Looking very smart the finished Honda CBR125 Commuterlite on Sydney Motorsport Park Pit lane.
License:
See above, "I digress" get this sorted ASAP.
Race Day Prep:
What to take to the track?. Fuel, about 10L should be more than enough (Remember NO ethanol based fuels) Ear plugs and ear muffs for your pit crew. Pack tools, anything that you used on the bike, spanners, sockets, screwdrivers etc… Cordless drill and common metric drill bits Cable Ties, to secure your transponder. Spares eg bar ends, levers, spark plug, oil, water, chain lube / fork oil / brake fluid / Tire Pressure Gauge and good quality tire pump. Some rags can be very useful if you have to do any repairs.
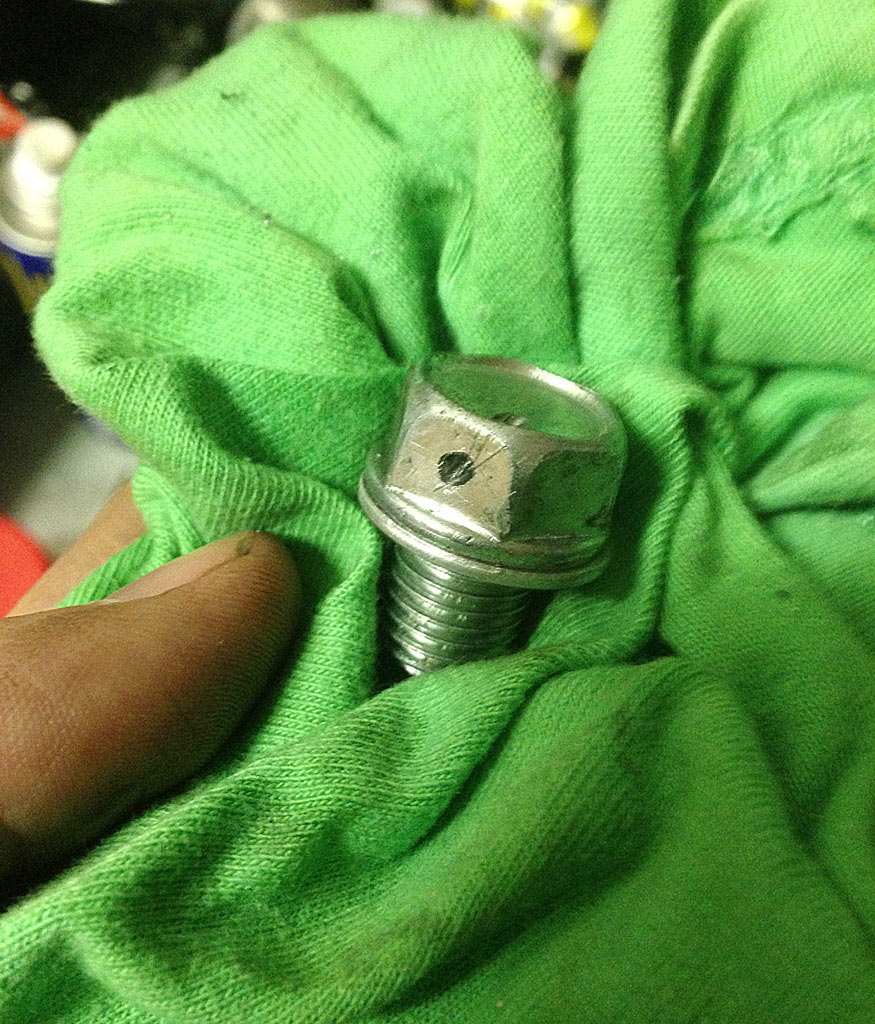
Spare nuts/bolts. Anything you used in building the bike take along. I ended up needing a couple of bits from this
Food/drinking water/powerade/fruit, food is available but you don’t want a big heavy stomach after eating something that is fat laden and deep fried. Also if you end up needing to do some adjustments or repair between races you may not have time to get any.
A small table, a chair and a kettle for those who like a cuppa makes for some creature comfort between races.
Important:
You will not be allowed to race if you do not have any of the following items with you at scrutineering. Your riding gear must be of approved type and in good condition.
- License and club membership
- Leathers
- Boots
- Gloves
- Helmet
- Back protector
- Compression Clothing,
worth its money you can get a good pair for under
$50 if you look around.
Just before the day:
Check your fluids. Adjust chain. Go over all Nuts bolts and screws for correct tension.
On the day:
Make sure you have $50.00 deposit for transponder.
Tire Pressures, Inflate your tires up before you get to the track and then let them down. Get a good tire gauge and your a foot pump
Race Day: Round One Sydney Motorsport Park
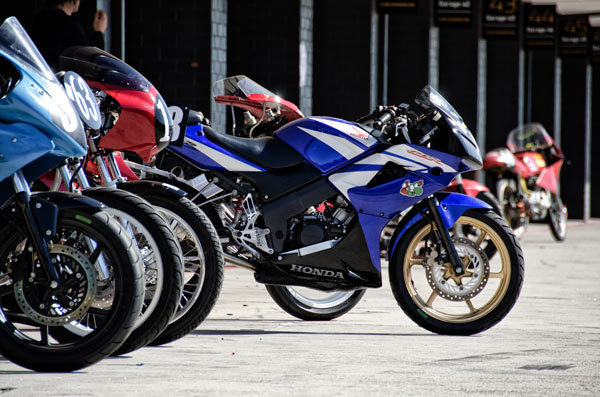
Lined up on pit lane raring to go! First
time out at Round one Eastern Creek SMP.
I have never ridden Sydney Motorsport Park (Eastern Creek) before and the last time I actually rode a bike was over 6 months ago. I was not in a position to take any serious test rides before I got to the track so the first time I actually rode my bike was out onto pit lane. Now I must admit to being very nervous on the day. I think more of it was associated with the bike being passed for racing given that everything came down to the wire for me.
Once the bike had passed I felt much better but there was a delay leading in to our practice. I must admit to then having the nerves mount. I was about to head out on an unproven bike, as a rider that was inexperienced, into a race environment.
Once practice 4 came up on the board I headed out
trying to find the back of the exit pack. The field
for this class was huge. I made my way out and
blundered through the first lap trying to figure out
what was going on. First thing of note, I had set my
gear lever on the rear set way to low and
down-shifting was near on impossible. Of course
looking down did not help my lines on the track. I
reached the final turn onto the main straight when I
was passed for the first time whilst being mid
corner. This came as a momentary fright as I was not
expecting it. The next lap was nearly identical, all
over the place and struggling with the gears. More
so this lap than the previous I kept hitting the
rev-limiter, especially on the exit of the corners.
End of lap 2 I passed the start/finish line when
I get a sudden decrease in power. I ran the bike
wide to get out of the road and it stalled. I
assumed that I had run out of fuel. Until I looked
down at the front disc calliper and could see smoke
coming out of them. The front brakes had seized shut
and my front wheel would not turn. At the end of
practice the truck came and picked me up returning
the bike to the pits.
I am so grateful at this point to all the people
that took the time to give me a hand. I had
purchased some aftermarket brake levers that had a
grub screw to control the plunger. I had over
tightened this (relative to the brakes) and it had
not allowed the pressure on the front brake pistons
to release, pushing the pads into constant contact
thus overheating them. Once they were pushed back,
the lever adjusted and the fluid checked, I adjusted
the gear lever and then gingerly prepared for
Qualifying.
In qualifying 4 I had a better
time, still hitting the limiter when not paying
attention but the first 2 laps the shifting was much
cleaner; however on lap 3 it felt a little difficult
again. On return to the pits the shifter adjuster
had come loose. Re-tightened again and made sure
they there "locked" correctly. Best lap was
1:57.2600 achieved on my last lap out. This put me
in 38th on the grid. 6.5 seconds off the next
commuterlite.
Race 1 (R4) was a bit daunting, to suddenly be on
the grid with 40 other bikes, worrying about grid
spots etc. Found my spot ok and waited for the
start. To be honest I don't even remember the seeing
the red lights. Shifting was much cleaner so I was
not hitting the redline as often. On the last lap I
got passed by the lead riders and my gear lever
started feeling flat. Placed 37th best lap 1:52.5990
an improvement of 4.661 compared to qualifying. On
return to the pit I found that the main pivot nut on
my gear shifter had worked its way loose and need to
be tightened.
Race 2 (R11) I was more relaxed
getting my grid position. I was 37 this time so just
one to the right of where I was in the race before.
I watched the lights this time and got a much better
start. I was able to keep up with the back of the
pack until turn 2. Whilst I lost the bulk of the
pack I was able to get in front of one of the
superlite’s by turn 5. Keeping ahead of him proved
to be a task with the two of us swapping positions
twice before the end of the race. I still got lapped
by the leaders near the end of my 3rd lap but
nowhere near the number of times hitting the rev
limiter this time and the gears felt good until the
warm down lap. On return to the pit the toe part of
the actuator had come undone and was a bit floppy.
Still 37th place but a best lap of 1:50.2400, 2.359
better than the last race and 7.02 seconds off my
qualifying.
To think that I had a lot of fun, gained some
confidence and was consistently improving in what I
believe is a fantastic result for me. This was never
about going stupidly fast it is about the experience
of competing in something that I never thought I
would do. I still have a lot of improvement to make
and I love the fact that I do. At this point I feel
it’s the 80/20 rule. 80% of the issue is me and 20%
is bike. Lots of work to do!
The bike is back
in the shed about to be pulled down for some work
before the next round in a few weeks. Looking
forward to heading out with not so much nerves and
working on my riding skills.
This
project is doable by the average person. If you have
been thinking about it, follow the guide on the
site, ring up some club members, check out the forum
and pop along to a race.
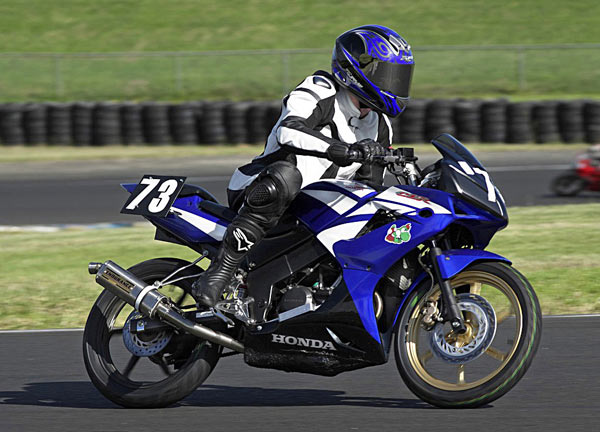
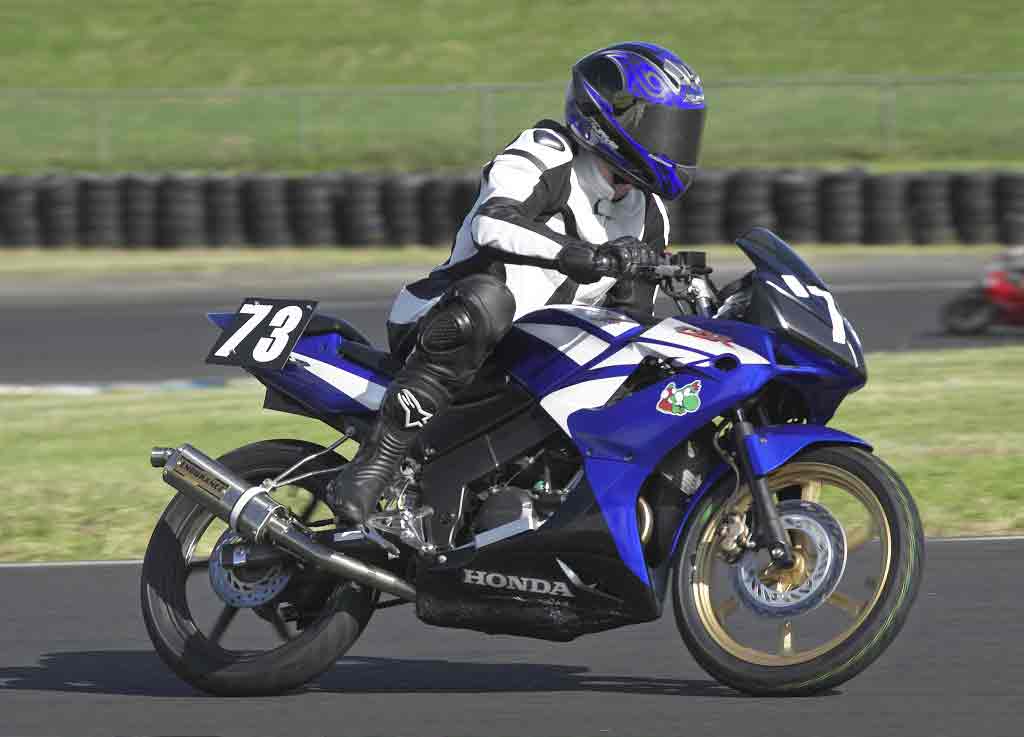
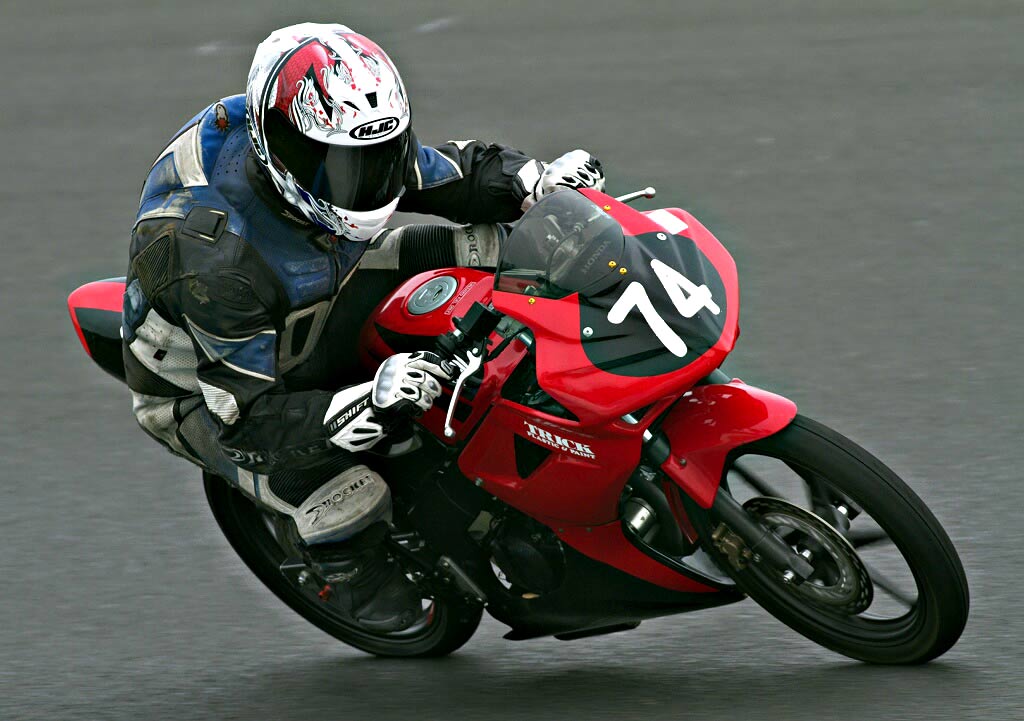
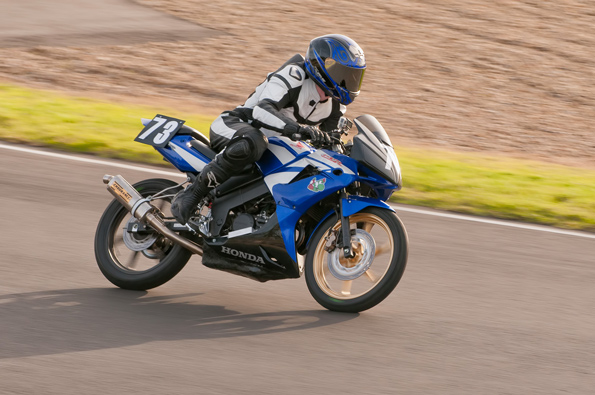
Oliver's
Honda CBR125 Commuterlite
in action at Round one Sydney Motorsport Park.
 Oliver in a hurry Honda CBR125 Commuterlite at Round one Sydney Motorsport Park.
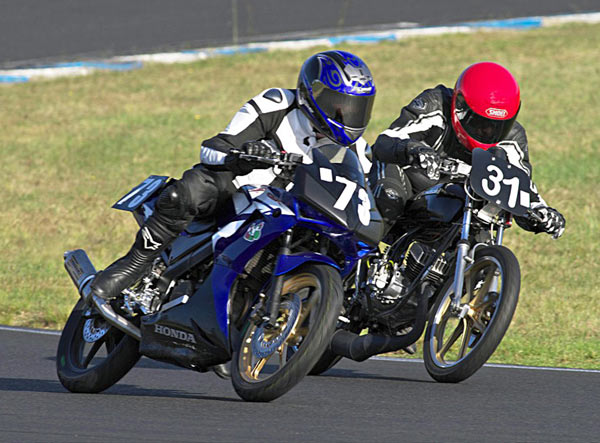
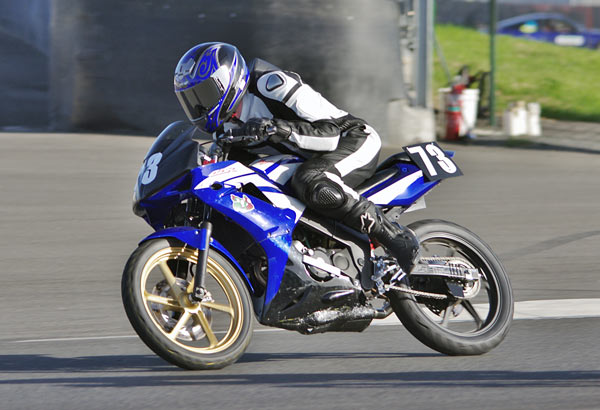
Oliver
dicing with #31 Duncan Taylor Kawasaki K100
Superlite. Honda CBR125 Commuterlite against a
Kawasaki KH100 Superlite.
Oliver on the Honda CBR125 at Round 2 South Circuit Sydney motorsport Park
For the Cheapest Entry into Motorcycle Tarmac Racing get on a Commuterlite
![]()
WAY TO GO!
Copyright of The Bucket Racing Association NSW © 2012 All Rights Reserved