Building a Honda CBR125 Commuterlite Bucket Racer
This has been a long running article on preparing a Honda CBR125 for racing in the Bucket Racings associations Commuterlite class.
This class has grown dramatically with young and old trying their hand in this ultra competitive economical class.
After cutting their teeth on these nimble machines and having caught the racing bug riders tend move to on to Superlites, Motolites or the historic classes, P6 125s and the increasingly popular 250cc production class mostly Honda CBR250RR or Yamahas LC250 being the popular choices there.
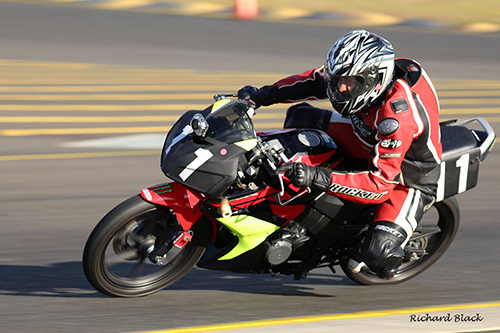
The Commuterlite class allows any ADR compliant 125cc 4
stroke motorcycle, of any age to race. The
Rules.
have been kept very simple only allowing changes to exhaust,
suspension gearing and bodywork. These simple rules keep the costs down to the very minimum
and have been creating close and
exciting racing where beginner and accomplished riders alike can hone
their race craft and have a lot of fun in the process.
Currently the choices are:
- Honda CBR125
- Yamaha YZF R125
- KTM 125 Duke
- Aprilia RS4
- Suzuki GSX-R125
- Kymco 125 Quannon
Of the above bikes the Honda CBR125 is by far in the majority but there has been a few Yamahas and a sole KTM 125 Duke. In the right hands any bike can be competitive the Honda CBRs are readily available and cheap to prepare and run.
There may be other Asian bikes out there which could be eligible, however for this article we will only concern ourselves with the Honda CBR125.
Sourcing a suitable Commuterlite
Look in the Auctions, Wreckers, Gumtree, Trading post and motorcycle sales sites on the web. Usually the Honda CBR125 can be picked up cheap with superficial crash damage.
Success
So you've managed to get your hands on a
donor Honda CBR125.
To turn your sporty road going bike into a
competitive Commuterlite race bike You will need to do
the following:
First of all remove all the unnecessary stuff like:
- Headlights
- Indicators
- Rear mudguard and Rego plate bracket. (You will have to cut these off of the underside plastic toolbox tray and battery box container).
- Passenger footrests and hangers. (You may need to keep the Right side one to hang the exhaust on).
- Any unnecessary bolt on brackets on frame.
- Standard exhaust.
- Sidestand (beware see further on)
Race preparation
Race preparation must be done according to the
MA's Road racing GCRs (General Competition Rules) which can be found in
the MOMs (Manual Of Motorcycle Sport). The manual is published
in it's entirety on the web and
can be found
HERE... on the MA's website.
Shopping List
Put the following on your shopping list:
- Tires; Up to Year 2010, 100/80 x 17 rear and 90/80 x17 front
- Tires; After 2010, 130/70 x 17 rear and 100/80 x17 front (MITAS seems to be the tyre to have.)
- After market sports exhaust.
- Lock wire
- Roll of pvc tape.
- Race Numbers
- Race number background paint (BlacK)
For Recalibrating the Fuel Injection map.
- 1x 5K potentiometer
- a few 1/2 watt resistors
- 50mm clear sleeve or heat shrink to slip over resistor.
Engine
The engine must remain standard, it should be ultra reliable keeping running costs down.
The OEM ECU must be
retained and rev limiter must remain in operation.
The starter motor must remain along with the battery and standard alternator, all OEM. The bike must be able to start off of it's installed start motor at all times.
Exhaust
After market sports exhaust.A good aftermarket exhaust has power and weight benefits. Fuel Injection map will need to be recalibrated when hi-performance exhaust fitted (see below).
(Stock pipe with catalytic converter is a perfomance killer and heavy.)
There are many brands of exhaust systems to choose from. NMF, Danmoto, Yoshimura, DBS, Endurance and homemade systems have enjoyed success.
Fuel Injection
- Fuel Injection must be retained, carbys not allowed if fuel
injection is originally fitted.
- When a hi-performance exhaust is fitted the fuel map has to be recalibrated.
Recalibrating the fuel map:
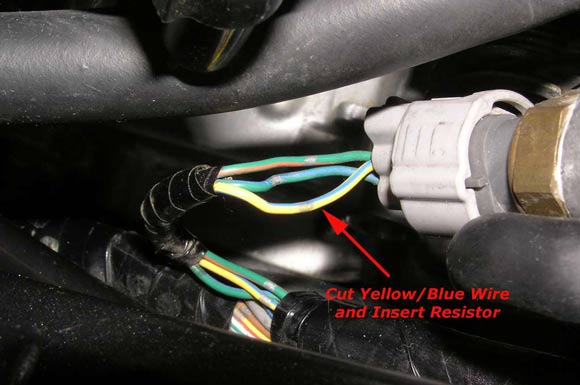
- Find the
plug (3 wires) for the water temp sensor on the thermostat
housing. (Underneath the petrol tank on RHS
looking forward)
See picture below.
- Cut the Yellow/Blue wire and place a 0-5K
potentiometer (available from Jaycar) in series. More resistance
= more fuel. Preferably done on a Dyno with an O2 sensor although it can be sorted at a track day. Once
the correct value has been established, replace the potentiometer
with a 1w resistor of the closest standard value.
- Resistor size in 1.2Kohm to 1.8Kohm range seems to work. Several bikes run well on aroud a 1.4K resistor but it can vary.
Wiring Electrical.
All electrical equipment not required on a race bike should be discarded.
Disconnect the battery before doing any electrical work.:
Discard
- Headlights, tail light, flasher lights and flasher unit.
- Horn, you wont be needing it on the track.
-
It's ok with the rules to remove the radiator fan.
- sub sections of wiring loom not needed can go but be careful when disconnecting stuff as for instance when you remove the side stand and disconnect it's switch the bike wont start.
- As you progress through disconnecting things, reconnect the
battery every other disconnection and check the bike still
starts. That way you wont have far to backtrack to troubleshoot
the problem.
The tilt switch has also caused some grief,
if your bike doesn't start check that its in the
right orientation. If it's upside down it sends a
signal to the CPU that the bike is upside down and
shouldn't be running.
Instrument Panel
The standard instrument panel is good to use does the job but its ok to use aftermarket gauges if it's damaged. Replacement cost of standard panel is prohibitive.
Airbox.
Leave the air box in place along with
the inlet bellmouth. Remove the airfilter if you like.
Fuel
No point in using exotic fuels, compression ratio too low.
Chassis Mods.
Tyres
Sticky tires. Mitas 110/80 x 17 rear and 90/80 x 17 front
are a popular choice and reasonably priced. They must be mounted on standard OEM
rims. Get the tyre fitted by your seller and have the wheels
balanced.
After 2010 the CBR125 have wider wheels.
Their wheel sizes are front 100/80-17 - rear 130/70-17
Forks
Use 20W fork oil and a 25mm to 35mm spacer to increase spring rate.
Rear Suspension
Rear suspension unit can be modified/changed but it is ok-ish if it's in good condition. The adjustable YSS and Elka shocks made for the CBR125 are a improvement but are expensive. A cheaper alternative is to get the proven Keo Watson modified unit. He does these units on an exchange basis.
Rear set Footpegs
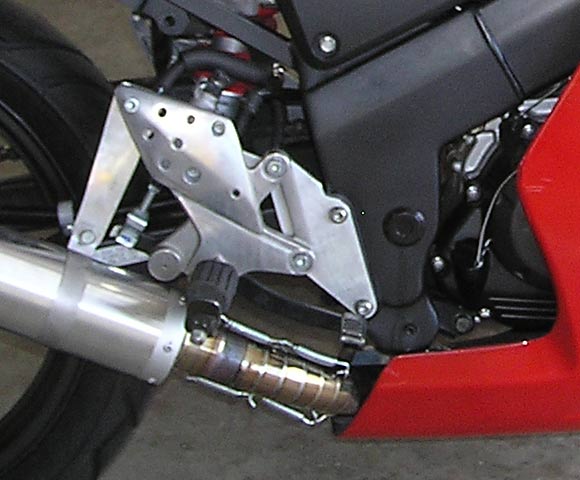
Footpegs can be left as is but they are low and can ground. Two alloy
plates as per the picture below can be run up and do the job nicely
getting the footrests up and back. Aftermarket footrests are available
from Thailand but again bumps the cost up.
Rear sub-frame.
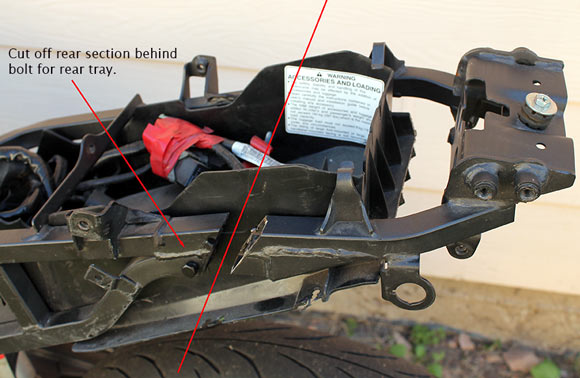
To facilitate the fitting of aftermarket fibreglass seats the rules allow the back section of the rear sub-frame to be cut off as per the picture below.
If you retain the original rear plastic leave sub-frame in place as the rear seat cowl need it for support.
 nbsp;
nbsp;
Bodywork/Fairing.
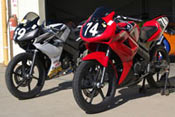
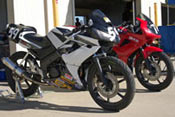
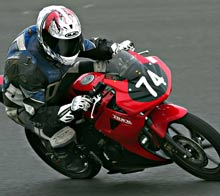
Replica Fibreglass of original production style silhouette can be used (#74 Red bike above) but standard bodywork plastic can be used to keep costs down.
Lights and all road paraphernalia will have to be removed and headlamp openings to be covered for racing. (#59 White/Black bike above)
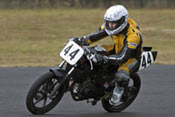
Otherwise race the bike naked with normal number plates (as 44 Mark Strong's bike above)
Not pretty though.
Putting it all together
When you have obtained the items given in the shopping list above it's just a matter of assembling your racer. Just follow the info given above.
- If you have bought an aftermarket exhaust it should
go straight on without any dramas.
- The original plastic can be used but the headlight
holes will have to be neatly covered. This is the cheapest option.
- Racing fiberglass fairing and seat styled on the originals are
available but they bump the cost up a bit.
- Recalibrate the fuel mapping as above.
Lock wire the following:
- Front brake caliper bolts.
- Oil filler cap.
- Oil Sump plug
- Radiator water cap
Drilling small holes for the lockwire in bolt heads and nuts require
a little patience.

Choose your colour scheme, stick some numbers on and go racing.
If the donor bike you bought is low mileage and the engine runs ok then don't go looking for trouble just run it. These things are dead reliable and dirt cheap to run.
Time to complete the above shouldn't take more than a day or two, certainly not more then a week, however if you are the meticulous type take as long as you like.
Good advice
As always when
modifications are required especially around
parts that may affect safety like brakes and
controls the work must be done properly. If
you are not sure of what you are doing get
some expert advice or have a qualified
person do the work.
All the modifications
listed here are tried and tested for the
race track but a
certain amount of skill is required to do
some of them. Scrutineering is getting
stricter all the time so all the basics need
to be covered otherwise you wont get to
race.
Some of the
modifications will make the bike illegal for
street use.
To contact any of the
Committee members or bike class
representatives.
CLICK HERE to go to the Committee Page.
They are a friendly bunch and are only too
eager to help.
Alternatively contact the engineering people advertising on the website.
History of Commuterlites
First Trial

Commuterlite Champions
Commuterlite Pro
- 2018 Brad Lumb (Honda CBR125)
- 2017 Keo Watson (Honda CBR125)
- 2016 Keo Watson (Honda CBR125)
- 2015 Nicholas Miller (Honda CBR125)
- 2014 Ron Pulido (Honda CBR125)
- 2013 Anthony Marsden (CBR125)
- 2012 Ryan Young (Honda CBR125)
- 2011 Ron Carrick (Honda CBR125)
Commuterlite AM
- 2018 Robert Hodgeson(CBR125)
- 2017 Gregory Burt (Honda CBR125)
- 2016 Luke Rhodes (Honda CBR125)
- 2015 Rez Pulido (CBR125)
- 2014 Adam Cameron (CBR125)
One Hour Winning Teams
- 2018 Brad Lumb/Niall Doherty
- 2017 Ken/Keo Watson(CBR125)
- 2016 Ken/Keo Watson(CBR125)
- 2015 Steve Kairl/Lorraine Stewart
- 2014 Nicolas Wenban/Ron Pulido
- 2013 Jason Blanch/Dave Abbott
- 2012 Steve Kairl/Graham Kairl
- 2011 Ron Carrick/Chad Slade
A Commuterlite Experience.
Blair Briggs #23.
Click here... to read Blair's take on his first experience of Commuterlite racing.
Check out Blair's bike racing profile on the OzLaverda website and while you are there follow the fascinating tale of how a bunch od dedicated Laverda fans brought the marque back to championship winning form Blair being one of the riders.
Thirty Years of Bucket Racing
1988 to 2018
In 2018 The Bucket Racing Association of NSW will be celebrating it thirtieth Anniversary. It seems like only a short while ago we were celebrating the 25th Anniversary, how time flies. More...
To read "30 Years on, what is Bucket Racing?"
Click Here...
Suzuki GSX-R125 Latest Commuterlite Challenger
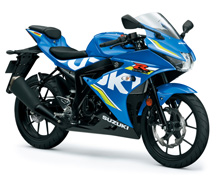
Will this be the bike to topple the all conquering Hondas.
Honda CBR125's have won all the Commuterlite Championships both PRO and AM since the Commuterlites class was launched in 2011.
The Hondas have also won 6 out 7 One Hour Enduro with the Yamaha Of Steve Kairl and Lorraine Stewart pinching a win in 2015.
Bike Choices
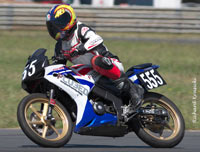
Honda CBR125. Most popular choice by far. Cheap, fast enough, dead reliable and in large numbers makes them the most successful bike in this booming class.
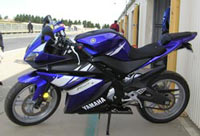
Yamaha YFZR125 At times have been
competitive but only one or two running at the most.
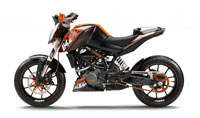
KTM125 Duke. Yet to set the class on fire. Strong midfield runner, nice to see someone trying something different..
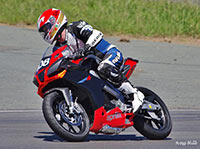
Aprilia 125 RS4. It will be interesting to see if this pretty looking Apriliia will break the Honda CBR125's stranglehold on this class.
OZ RACE FAIRINGS
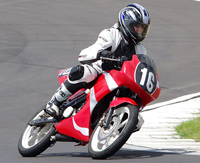
Bob Young
Lightweight custom made or pattern fibreglass for modern and historic race and road bikes.
Robertson NSW
This could be YOU!
Get yourself a Honda CBR125 or similar and live the dream,
racing in the Commuterlite Class.
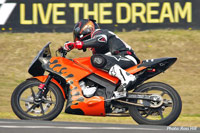
Commuterlite AM Champion. Adam Cameron started racing in Commuterlites in 2014 and won the AM Championship at his first attempt. It's called...
LIVING THE DREAM
Adam will be competing in the Commuterlite Pro class in 2015.
Young and old are enjoying racing in this very competitive class. You owe it to yourself to give it a go.
Contact the BRA NOW!
Oliver's Story

Read Oliver Higgins account of building a
Honda CBR125 Commuterlite Racer eligible for the Bucket
Racing Association's (BRA) race series. This series is run in conjunction with
the Post Classic Racing Association (PCRA).
Click
Here for Oliver's Story...
Great Start for Supermono Racers
The Supermono race bikes first outing in Motolites on the South Circuit at SMB had a brilliant start finishing 2nd overall with Steve Kairl on board. Steve on a 150cc Supermono and Raymond Perez (197 Supermono) fought race long duels with each other and the more established Motolite runners. The Supermono missed out on a double podium when Raymond stopped, out of fuel on the last lap.
Some brilliant riding by Steve kept the 150cc Supermono in the hunt to bring it home to a well deserved 2nd place.
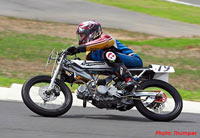
Above: Steve Kairl on the limit on the 150 Supermono
